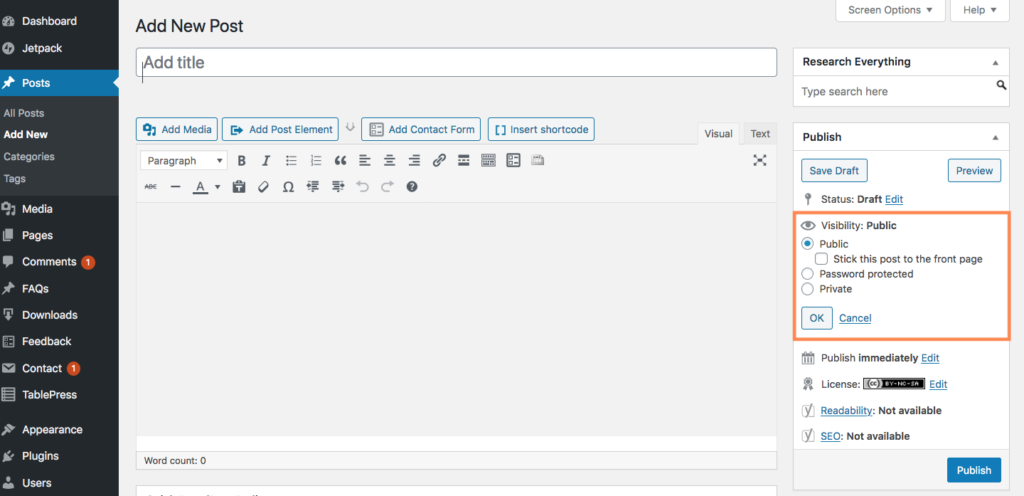
There are various strategies for managing your privacy on the Commons and different levels of privacy for sites and groups. Sometimes you might only need to hide a single page, or make a certain post private. Directions for these more granular options are below.
Password-Protected Pages
To make a particular page password-protected:
- Create the page and add your content.
- Locate the Publish module in the right side menu on the page.
- Select “Password protected” and set the password needed to see the page.
Select “OK” then click“Publish”/”Update”.
Once you determine the password, you will need to share it with users so they can access and view the page. Sometimes instructors who use this option often use a simple password, such as a combination of their last name, the semester, and/or common term used in the course.

Private Posts
To make a particular post private:
- Create the post and add your content.
- Locate the Publish module in the right side menu.
- Select the Visibility setting that determines who can see your post:
- “Password protected” means a user will enter a password to view your post.
- “Private” means that only blog Editors and Administrators will be able to view your post.
Select “OK” then click“Publish”/”Update”. These changes will go into effect immediately, but can be updated anytime if you choose to change the visibility of your post.
Default Private Posts
By default all posts are public and visible to whoever can see your site (determined by the site’s visibility settings). If you are an Administrator on a site and you want all posts to be visible only to the post creator (ex: students) and administrators (ex: instructor) you can add the plugin Private Posts Default. To add the plugin visit “Plugins” area of the dashboard and search for “PrivatePostDefault” to activate this plugin. This sets posts default visibility setting as “private”.


