Displaying a timeline on a Commons site is a powerful way to provide a historical events surrounding your topic. There are three plugins on the Commons which provide this functionality.
Knight Lab TimelineJS
The Knight Lab TimelineJS plugin is a powerful tool for creating visual timelines that can be embedded directly into your site’s pages and posts. Each timeline entry can include (besides date and textual information), embedded images from Flickr, tweets from Twitter, video embeds from YouTube, DailyMotion, or Vimeo, articles from Wikipedia, sound from SoundCloud and map embeds from Google Maps. You can easily control the display of your work using a WordPress shortcode.
This plugin requires an external Google spreadsheet that is published on the Web and publicly accessible.
The process, described here in depth, is to
- create a Google Docs spreadsheet using this template
- publish it to the Web and make it publicly accessible
- create a page or post on your WordPress site
- add a shortcode to display your timeline, using the web address of your Google Docs spreadsheet, plus any desired parameters.
The shortcode should look something like this:
[timeline
src="https://docs.google.com/spreadsheets/d/1oVnTNKW2a6dqf05BeLKCgjYJy-9q-Fv_EJbLJ4XJxXw/edit#gid=0"
width="100%" height="650" font="Default" lang="en" version="timeline3" ]
Make sure the shortcode is the first, and only line in your page or post.
Your Google Docs spreadsheet has seven columns. Only two are required, the start date and the headline. Follow the pattern used in the template, and you should be good to go.
Check out examples of user created timelines at to get some ideas of what you can do.
Here is a video to help guide you through the four step process. (It does not cover how to create the WordPress shortcode.)
Post Timeline
Post Timeline pulls its data from your posts or from any custom post type that you may have on your site. By default, it uses a custom post type called “Post-timeline,” but you can easily change it to just pull content from your posts. Either way, you can further control what appears in your timeline by using categories or tags. Timelines can be either vertical or horizontal. On the plugin’s dashboard page, you create a short code for your timeline and configure how it is displayed. If you use the Post-timeline custom post type, you have more control on time line event dates, media, and icons. Using just a plain post, the event date will display the post’s published date and the featured image (if added) will be displayed.
The plugin has many options, but please note the Commons does not have the premium version of the plugin. A number of video tutorials can be accessed here:
Cool Timeline
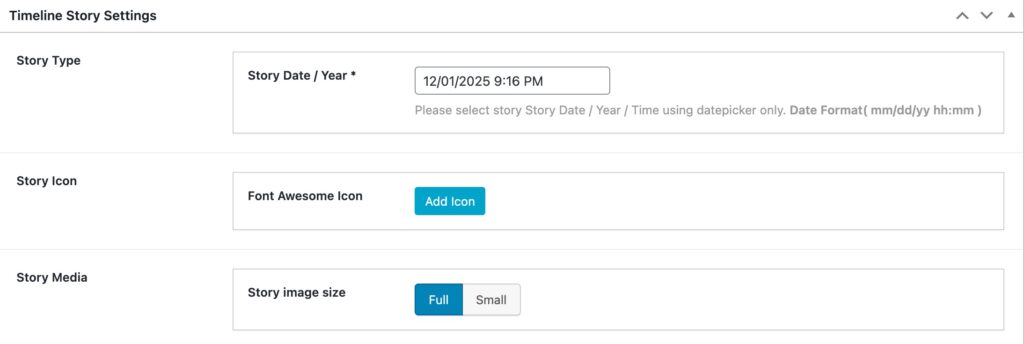
Cool Timeline is perhaps less complicated than the other two options, but provides fewer options. It displays a timeline based on custom post type called “stories.” It does not interact with your posts and does not have seem to allow more than one timeline on your site. (The premium version has many more features, but on the Commons, we have only the free one installed. )
The plugin can display timelines either vertically or horizontally. Its usefulness is its simplicity. You create a set of stories. Each story has a title (post title, some text (post content), a date, and an icon, and an image (post featured image), which can be full or small size.