
Site Visibility
To adjust the privacy settings on your individual or group site go, on your WordPress dashboard to Settings >> Reading.
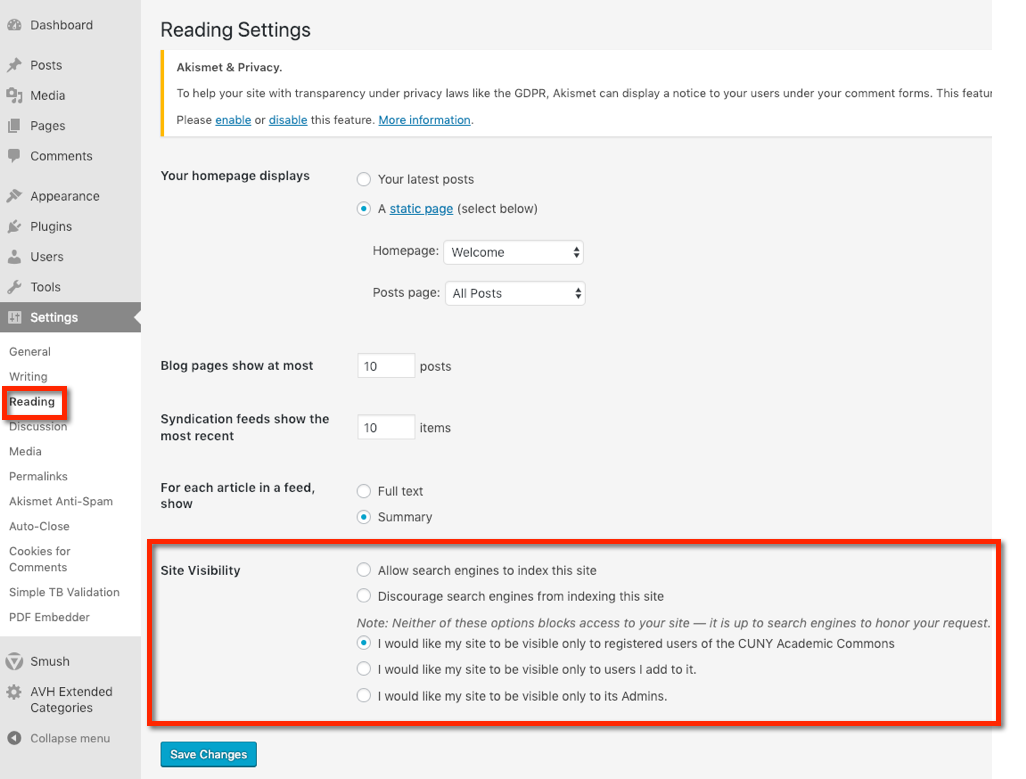
Select one of the five visibility options.
To make your site open to everyone on the web, choose “Allow search engines to index this site.”
On the other end of privacy, especially if your site is in development, you might choose “I would like my site visible only to its Admins.”
Remember to Save changes.
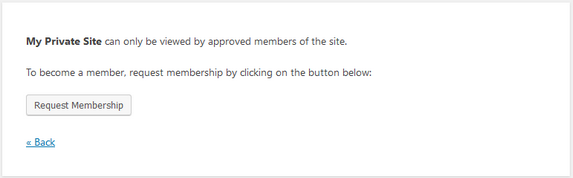
I Would Like My Site To Be Visible Only To Users I Add To It
If you pick this privacy setting, a splash page will appear when a non-user attempts to view your site. This would likely happen when that Commons member sees a site that looks interesting and clicks on it. It is designed to simplify user membership requests. The site admin can either approve or deny the request. Here is what the splash page looks like:
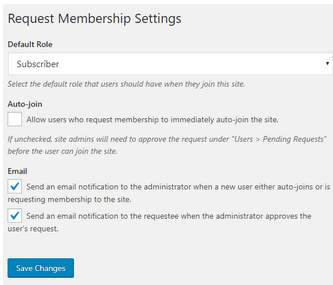
The user will be added to your site in “Pending” status. To approve or deny, you would need to go to “Users>>Pending” :

Conversely, you can auto-approve Commons users who ask to become members of your private site. In “Settings>>Request Membership” you can check the “Auto-Join” box shown below:
Page and Post Visibility
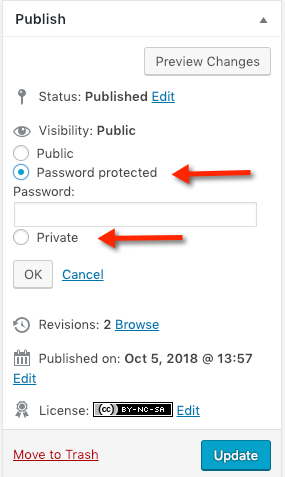
If you want to make particular posts or pages accessible to a private audience, navigate to the Publish options on the right side of the page.
Under the Visibility option, you can choose “Password protected” in which case you will enter a password that you’ll share with whomever you wish or “Private” so that site editors and admins will only be able to view. Select “OK” and then either “Publish” or ”Update”.
Block Visibility – Another Privacy Tool
If you are using the block editor, you can control which individual blocks should be visible, based on many conditions.
Introduction
Commons site admins have the ability to make entire sites private to site members, or make sites private to only signed-on members on the Commons, or to password protect pages or posts to only users who know and can enter the correct password. There also exists an option in the block editor to make individual blocks visible based on a variety of conditions.
Although many themes and block libraries automatically enable the visibility option, the safest way to ensure it is available for every block is to activate the Visibility Block plugin.
More often than not, you’ll want to control visibility by using a group block which controls its underlying blocks. For example, if you want to make a series of text blocks private, make them part of a group block, and make that block visible only to the audience you select.
What Are the Available Visibility Options
Visibility conditions are housed within a rule group. A rule group can have just one condition and many conditions. If there are multiple conditions, the rule group is controlled using “AND”. If an “OR” condition is needed, another rule group should be created.
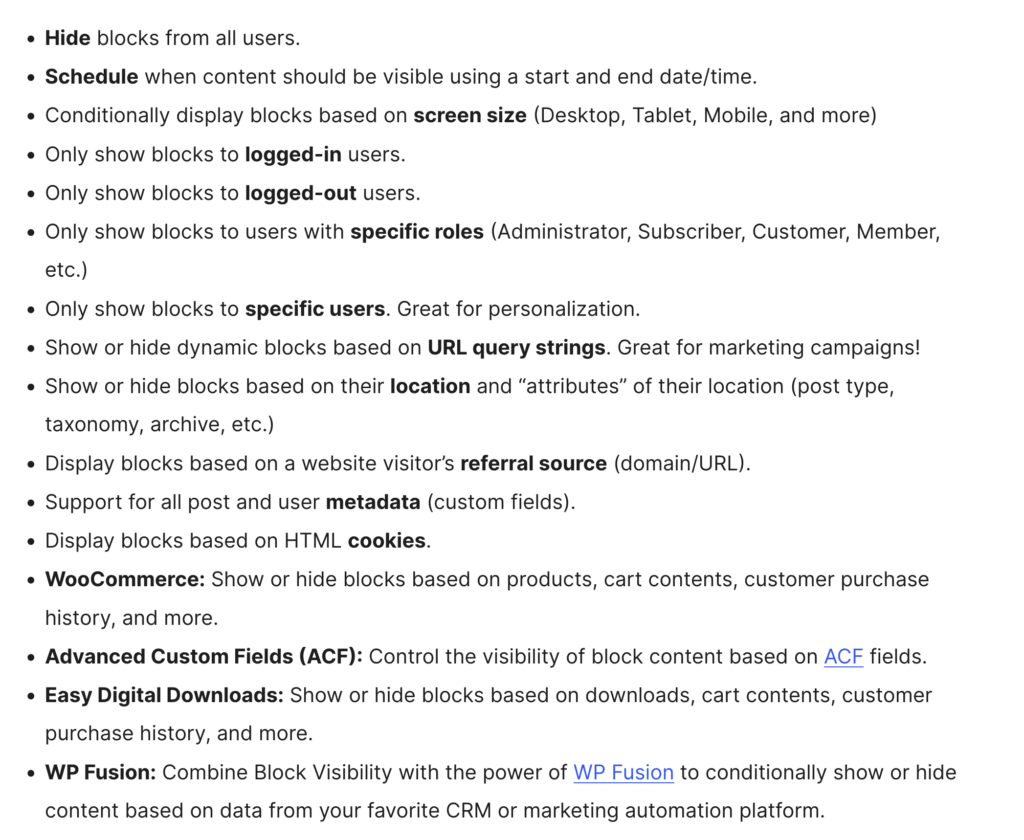
Here are just some of the conditions available with the Block Visibility plugin:
How to Set a Block’s Visibility
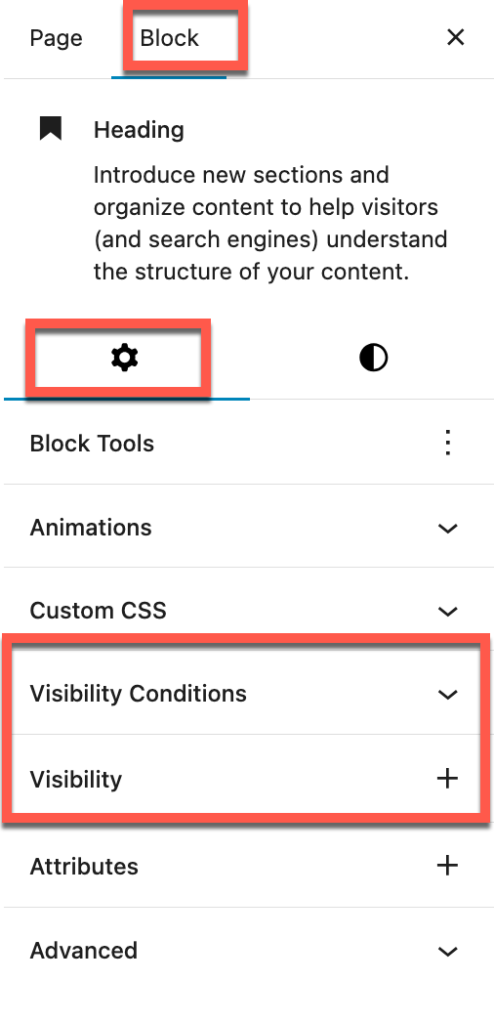
To view a block’s visibility options, highlight the block and you will see the following in your sidebar:
By default, a number on visibility conditions are activated. If you want to activate some of the less-used conditions, go to “Visibility” and add them. Otherwise, when you click on “Select a Condition”, those options will be darkened and not able to be selected.
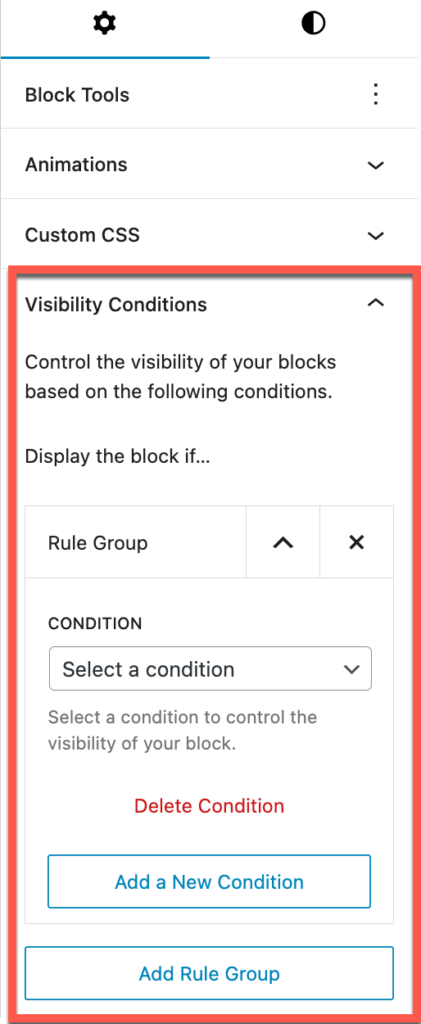
Here you can add or delete conditions to a rule group. You can also add or delete rule groups.
When you select a condition you will see the option to either display or hide the block.